Arduino Yun and Websockets

Back to the: Digital Maker Collective
I've spent the last two weeks or so trying to connect an Arduino Yun to a server using websockets. I've finally got my head round the whole thing, and will share how I did it here! Click read more....
 First, I'll explain why I was doing this. I'm working on a collaborative art project that will involve connecting various sensors based installations to a central server. Now, I thought I would have a go using an Arduino Yun, which is a powerful Arduino with WiFi capabilities (that has just recently been discontinued). It consists of two main chips. The first is an ordinary Arduino chip, ATmega16U4, which is where you control all your sensors and other bits from. The second chip is a Atheros AR9331, which has a linux operating system on (OpenWrt-Yun). This makes it a lot more powerful than just a simple microcontroller. It also makes it more confusing to work with.
 Now, it's a trivial matter to connect this to a website to send data. Normal http messages are pretty slow however, and there would be a significant delay between messages. I would like to be able to continuously send data quickly to allow a greater range of responses to the sensors. For instance, if you were to have an accelerometer send acceleration data to a website, you could have an object move in sync with it if the connection is fast enough. Fortunately, there is a method for sending data with very little latency, and it is called websockets! Here is a good explanation of what they are (although please note that it is a general protocol and can be implemented in languages other than python):
www.fullstackpython.com/websockets.html
They are trickier to use, however. It's difficult to get them working on shared hosting , and aren't well supported by PHP (from what I understand). One server side language that does support them well is node.js, which also has the advantage of being super fast. It is a way of writing servers that uses javascript. Unlike client-side javascript, however, it is compiled, and not interpreted, which is why it is so fast. There aren't too many hosts which support it, but I found one with a free option called Open Shift.
To get started, sign up for an Open Shift free node.js server and follow the instructions. Along the way you will need to install Git, Ruby and possible PuTTY. The setup will explain these, but in short, Git is used to upload code to the server, Ruby is used to install the setup tools, and PuTTY is used to remotely control the server (I haven't used this yet, but we'll need PuTTY for the Arduino side of things anyway). On a side note, this process is for windows. I don't know how it works on Mac and Linux.
Once you've set up the server you need to git clone the code! This is just downloading all of the server directories onto your local machine where you can edit them, and then reupload them. This does involve using the command line, but don't be scared! It's easy. Here's a basic introduction:
Press the windows key and then type cmd, then enter. This will open the command prompt. The first command you should learn is change directory. Type "cd" (without the quotes) and then a space, and then the path of a directory. This can either be an absolute path, or relative to the current directory you are in. For instance, to go to my documents, I could write "cd C:\users\<myname>\documents", where <myname> is my username. If I was already in "users", I could just type "cd <myname>\documents", but the first command would also still work. Now, to clone your directory, you need to change directory to wherever you want it to be, and type "git clone " and then the link that open shift gives you for your website's git repository. It will download, and then you can start editing it!
There is some sample server code already in the server.js file. This is what will continuously be running on the server. The other important bit is the index.html page, which is a html page we can send to the client. Node.js uses the concept of modules, which can be downloaded and installed using the Node Package Manager, or npm. You can store a list of all the modules your project requires in a json file named package, and you will find this already in your server directory. We will need to add another package to start using websockets, however! A popular choice is socket.io, but I wanted something simpler and faster, so opted for ws. To install it, simply type "npm install --save ws" into the command prompt while still in your server's directory. npm lets the computer know we are going to execute an npm command, install is the command to install, and ws is the name of the module we want to install. Simple! Anything after a dash, or two dashes (I don't know what the difference is yet), is a modifier to a command. In this case, save means the module will be added to your package.json file for you. Next you should type in "npm install". If you don't provide a package name, npm will just install all of the packages in the json file that are not currently installed in the current project. In this case, this should just be the module "express" that openshift adds by default. This makes it easier to create a server. Now, rename the server.js file and create a new one (this way we can always revert back to the default code if need be). First, we need to initialise various node stuff:
var server = require('http').createServer();
var url = require('url');
var WebSocketServer = require('ws').Server;
var wss = new WebSocketServer({ server: server });
var express = require('express');
var app = express();
var url = require('url');
var WebSocketServer = require('ws').Server;
var wss = new WebSocketServer({ server: server });
var express = require('express');
var app = express();
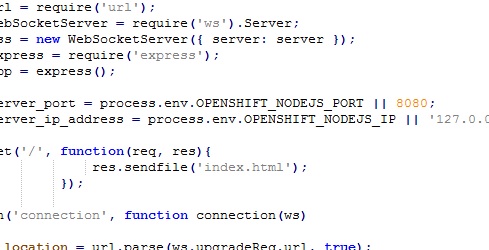
The first line creates a http server. The second provides commands for manipulating URLs. The third and fourth give us our web socket functionality, and the fifth and sixth implement express to help us create our website. Next we need some open shift specific bits of code:
var server_port = process.env.OPENSHIFT_NODEJS_PORT || 8080;
var server_ip_address = process.env.OPENSHIFT_NODEJS_IP || '127.0.0.1';
var server_ip_address = process.env.OPENSHIFT_NODEJS_IP || '127.0.0.1';
Open shift passes these two variables containing the IP address and port to the server code, so we store them in variables here. However, we also want to be able to test the server on our local machines, and so we provide some default options if the open shift variables are not passed to the code.
app.get('/', function(req, res){
res.sendfile('index.html');
});
res.sendfile('index.html');
});
The get function is used by express to send a page to the client based on what they type into the url. Here we are saying to display the index.html page, if just the basic URL is entered (the argument '/' means the basic URL. For instance, www.danielbandfield.com would be represented by '/' and www.danielbandfield.com/work-blog would be represented by '/work-blog').
wss.on('connection', function connection(ws)
{
var location = url.parse(ws.upgradeReq.url, true);
// you might use location.query.access_token to authenticate or share sessions
// or ws.upgradeReq.headers.cookie (see http://stackoverflow.com/a/16395220/151312)
ws.on('message', function incoming(message)
{
console.log('received: %s', message);
ws.send('message received');
});
ws.send('connected');
});
{
var location = url.parse(ws.upgradeReq.url, true);
// you might use location.query.access_token to authenticate or share sessions
// or ws.upgradeReq.headers.cookie (see http://stackoverflow.com/a/16395220/151312)
ws.on('message', function incoming(message)
{
console.log('received: %s', message);
ws.send('message received');
});
ws.send('connected');
});
The on function of the ws module is used to specify a function to call when particular events happen. He we have one nested inside another. The first one, "on('connection'..." specifies what to do when a client connects. We create URL object to use later on, and then define another function and then use the send function to send a String to the client saying they are connected. The second on function: "on('message'..." defines what to do when the server receives a message from the client. Here we send a message to the client saying 'message received'.
server.on('request', app);
server.listen(server_port, server_ip_address, function () { console.log('Listening on ' + server.address().port) });
server.listen(server_port, server_ip_address, function () { console.log('Listening on ' + server.address().port) });
The last part of the server code sends the application to the client when they ask for it, and starts listening for clients. That's all we need on the server side. Here is the client side javascript, that goes inside the index.html page:
console.log("Setup...");
var ws = new WebSocket("ws://digitalzoo-digitalzoo.rhcloud.com:8000/");
var time = performance.now();
var prevTime = performance.now();
var clock = 0;
var delta = 0;
var ws = new WebSocket("ws://digitalzoo-digitalzoo.rhcloud.com:8000/");
var time = performance.now();
var prevTime = performance.now();
var clock = 0;
var delta = 0;
The first line just sends a message to the console for debugging purposes. Next you can see the syntax for using websockets. Just create a websocket object using the URL of the website you want to send stuff to. Two things note: firstly, write ws:// instead of http://, and secondly, if you are using open shift, you have to specifically access port 8000. The standard ports don't work with websockets.
The rest of the variables are just used for the sample code I made, which sends a request every 5 seconds.
The rest of the variables are just used for the sample code I made, which sends a request every 5 seconds.
ws.onmessage = function(e)
{
console.log(e.data);
}
{
console.log(e.data);
}
We set the onmessage variable of the websocket object to be a function we want to run when we receive a message from the server. Here, we just log the response. Next we have the loop:
function messageLoop()
{
requestAnimationFrame(messageLoop);
time = performance.now();
delta = time - prevTime;
clock += delta;
if(clock > 5000)
{
console.log("Sending message...");
ws.send("Hello!");
clock = 0;
}
prevTime = time;
}
messageLoop();
{
requestAnimationFrame(messageLoop);
time = performance.now();
delta = time - prevTime;
clock += delta;
if(clock > 5000)
{
console.log("Sending message...");
ws.send("Hello!");
clock = 0;
}
prevTime = time;
}
messageLoop();
Most of this is just regulating the loop to run every 5 seconds. The important bit is "ws.send("Hello!");". This sends the string "Hello!" to the server. Thats all of the client side code! To try it out locally, just cd to your project's directory and type "npm start". Then type 127.0.0.1:8000 into your browser and watch the console. You should see messages every five seconds. When you are ready to upload it, type in "git add -A" to add all new files to your git upload. Press enter. Next type in "git commit -a -m 'a message'" commits changes to an upload. the -a modifier adds everything that has been changed since the last upload. -m is used to add a message (which you have to do for open shift to accept it). Press enter. Finally, type in "git push". Navigate to your website and watch the console to see if it worked!
Now we can move onto the Arduino.
First we should update the Yun. I had difficulty using the easy way, so I updated mine by flashing it. Here is a long explanation of how to do this. PLEASE FOLLOW THE STEPS EXACTLY!!!!!!! If you are unsure at any point, stop and seek advice from someone, because it's easy to break the Yun by doing this wrong. You'll need to connect the Yun via usb and ethernet. Make sure that when you type in the IP address of your computer, you use the ethernet IP address and not the wireless IP address. It's obvious in hindsight, but I spent ages using the wrong IP and not understanding why it wasn't working.
When that's all done, follow the instructions here to connect the Yun to your preferred wireless network. In my case, I needed to connect to a WPA2 Enterprise secured connection, which requires extra work. Follow these instructions to do this.
Next we need to install web socket functionality onto the linux chip. This message explains how to do all of this, but the installation instructions are now out of date, so follow this: This will use python to send websocket messages to our server. Open PuTTY and SSH into the Yun (there are instructions on how to do this on the getting started pages). Type "cd .." and enter until you get to the topmost directory (two dots mean go up). Enter: "opkg update". OpenWRT-Yun uses something called OPKG to install packages. These can do all sorts. It doesn't store a list of everything, so you have to download a list of all available packages before doing anything else, by using the update command. Next install nano (test editing software) by entering "opkg install nano". Next install setup-tools (a software installation package) by entering "opkg install python-setuptools". Next use this to install pip (another software installation package. I don't know why we have to use three different software installation programs, but it works) by entering "easy_install pip". Finally, we can install our Python Websocket software by entering "pip install websocket-client". From this point onwards you can follow the instructions in the forum post I linked to, to create a websocket test file. In my case, I replaced the URL with the URL of my open shift site (remember to specify the port!) and create a while loop to regularly send a message.
This how far I have got, but it all works! The next step is to setup sensors and pass readings from the Arduino chip to the Linux chip and onto the server.
")
To the extent possible under law, all copyright and related or neighboring rights to this Work, Arduino Yun and Websockets, by danielbandfield.com are Reserved.